Tuesday, May 24, 2011

'Mnogo socna" Reform Torta


Ja sam jedan od onih rijetkih koji nije znao za Reform Tortu. Najvjerovatnije ne zato sto je nisam prije vidio ili jeo, nego zato sto me donedavno nije zanimalo kako se koji kolac/torta zove.
Prvi put mi je ime ostalo kada su Brcici donijeli kutiju kolaca na Blue Mountain, i kada je Zlatko nagovarao Ranku da proba Reform Tortu...Kako god, onda je Dade na Majinom blogu detaljno napisao sve sto se treba znati o torti, a ja sam jos citao o Reform Torti na Maxivida-nom blogu, gdje je potpuno zasluzeno na Hall of fame. Da ne bih slucajno uradio nesto kako ne treba, konsultovao sam i Veliki Narodni Kuvar, i dosao da zakljucka da sam spreman uhvatiti se u kostac sa pravljenjem reform torte.
Napraviti i ispeci kore, umutiti i skuvati na pari fil, ohladiti sve, filovati na kraju, jednostavno zar ne?

E evo kako je to kod mene ispalo...

Potrebno:

Za kore:

12 bjelanaca
400 g samljevenog badema
300 g secera

Za fil

12 zumanaca
200 g secera
100 g cokolade za kuvanje
200 g putera

Za glazuru

100 g cokolade
100 ml mlijeka
20 g secera
1 jaje
50 g badema, isjeckanih na listice

A napraviti ovako:

1. Umutiti zumanca sa secerom dok ne 'pobijele'.


Kuvati ih na pari uz mijesanje, dodati izlomjenu cokoladu i mijesati dok se cokolada ne otopi a fil ne postane gust. skloniti sa sporeta i ostavit fil da se ohladi. Umutiti puter, pa ga dodati mlakom filu i umutiti.

2. Ugrijati rernu na 200° C. Podmazati 2 pleha velicine 25cmx35cm, pa staviti papir za pecenje preko.


3. Umutiti mikserom 6 bijelanaca, dodati 150 g secera i nastaviti sa mucenjenem dok se ne dobije cvsrti sne.  


4. Dodati 200 g badema, promijesati kasikom, sipati u pleh, poravnati


i peci 15 do 20 minuta.


Uraditi tako dva puta, i ohladiti kore.

5. Korama odrezati ivice. Ko god da je sa vama i pravi vam drustvo dok pravite tortu, dajte mu odreske :).


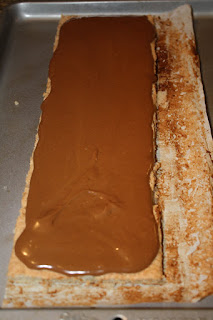
6. Izrezati kore po duzini da se dobiju 4 kore. Ostaviti papir na njima, pa poceti sa filovanjem.


7. Staviti drugu koru preko fila, pa pazljivo oguliti papir. Tako uraditi i sa ostalim korama.

8. E sada, kada vam kore kazu da fil nije bio dovoljno hladan i cvrst, i da su odlucile da se 'prosetaju',


a vi posaljite sve u p...m...., pa otvorite flasu vina ili nestog zestokog i .... onda napravite "Pravo Socnu' Reform Tortu.

9. Oblozite plasticnom folijom posudu oblika polulopte.


10. Izrezite tortu na trake, kocke, pa sve ubacite u posudu, poravnajte kasikom, pa pokrijte sa folijom i stavite u zamrzivac.


11. Za glazuru (kao sto Dade rece), otopite šećer u mlijeku i dodajte puter. Kada se i on otopi, u ključalu smesu sipajte jaje koje ste malo umutili mikserom, i sklonite odmah sa vatre. Još malo mutite mikserom, a onda ubacite i 100 g čokolade. Kad se čokolada otopi, mikserom sve sjedinite.

12. Ohladjenu 'tortu' prevrnuti na resetku ispod koje ste stavili pak papir. Preliti 'tortu' vrucom glazurom.

Staviti 'tortu' sa resetkom opet u zamrzivac na hladjenje 15 minuta. Preliv sa papira vratiti u serpu.

13. Izvaditi 'trtu' iz zamrzivaca pa opet preliti sa glazurom.


Pa jos jednom u zamrzivac, a ostatak preliva podijeliti sa nekim ko jos ima strpljenja da bude sa vama.

14. Ohladjenu tortu posuti-ukrasiti listicima badema, i sluziti...


Tako je moj prvi pokusaj da napravim Reform Tortu zavrsio neuspjehom, i najveci razlog sto nisam 'tako pazljivo' procitao Dadin recept. Kaze lijepo covjek ostavi fil nekoliko sati da se ohladi, a kod mene je to trajalo vise kao nekoliko minuta...Kazu pametni se uce na tudjim greskama, a oni drugi (kao ja) na svojim :).

Kako god, ukus torte je stvarno fenomenalan, probacu je opet praviti to znam...


Monday, May 16, 2011

Mnogo dobra 'Panja'

For recipe in english, please scroll down
 

Kako je u okviru igre "ajme, koliko nas je!", koju je pokrenula monsoonAna zadala pivo kao namirnicu za mjesec maj, meni je palo na pamet da probam da napravim hljeb sa pivom. Poslije male pretrage na netu nasao sam recept za Good (Beer) Bread.
Recept jednostavan, potrebno samo brasno, pivo, kvasac i so. Ja sam umijesio tijesto (kao po receptu :)) u subotu, ostavio preko noci u frizideru, pekao 'panju' u nedelju popodne, vrijedilo je cekati. Jedino malo neobicno su kocke leda, koje se ubace u vrucu rernu zajedno sa tijestom. One omoguce da se napravi para, koja opet pomogne da se napravi hrskava korica na hljebu koja treba da se proba da moze da se vjeruje kako je dobra. Uvijek me odusevi kada nesto sto je tako jednostavno za napraviti, bude nevjerovatno dobrog ukusa.

Nazalost, nisam stigao da napravim slike izrezane 'panje'. Nestala je cim se dovoljno ohladila da moze da se jede...


Potrebno:

500 g brasna
330 ml piva iz gajbe, ne iz frizidera :)
2 kasikice soli
1 kasikica instant kvasca (ili dovoljno svjezeg za ovu kolicinu brasna)
kocke leda
malo instant polente

A napraviti ovako:

Prosijati brasno, so i kvasac u vecu posudu. Dodati pivo i izmjesati kasikom. Prebaciti na pobrasnjenu radnu povrsinu i mijesiti 5 do 10 minuta. Napraviti loptu, staviti u nauljenu posudu pokriti providnom folijom i ostaviti na toplom mjestu sat vremena ili dok se tijesto ne udvostruci u zapremini. Premijesiti tijesto. Tijesto se ne mora vaditi iz posude, samo se krajevi  saviju prema sredini, pritisnu. Jednom tako uradjeno sa svih strana, okrenuti loptu, pokriti pa opet ostaviti na par sati. Jos jednom premijesiti, pokriti pa ostaviti u frizider da prenoci. Sutradan izvaditi tijesto iz frizidera, premijesiti jos jednom, staviti papir za pecenje na pleh, posuti sa zrnima polente, oblikovati veknu od tijesta pa staviti na pleh. Ostaviti da tijesto dostigne sobnu temperaturu, napraviti tri zareza ostrim nozem po povrsini, posuti zrnima polente pa staviti u ugrijanu rernu na 220°C. Staviti par kocki leda negdje u rerni ili u nekoj manjoj posudi pored pleha. Poslije pet minuta opet dodati par kocki leda. Peci 25 do 30 minuta, ili dok panja ne dobije lijepu smedjkastu boju. Izvaditi hljeb, staviti na resetku da se ohladi i sacekati bar 15 minuta prije nego sto uzmete kajmak, puter ili samo odlomite komad i ...


Original Recipe in English

A lot of people have asked for this recipe, and I keep promising to write it down, so here goes. You can use any kind of beer, and get a wonderful variety of colours and flavours, but I tend to prefer it with dark ales; they give the bread a darker crumb like a rye bread, and have a really malty, yeasty flavour that I like.  Really hoppy beers do a totally different thing, you should experiment.
I can’t take any credit for this at all – it’s how the French have made bread for 500 years, I suspect (albeit more often with water than beer.)  It takes about 15 minutes of active work (most of it up front), 30 minutes of baking (all of it at the end) and hours in between when you go and do other things.
Ingredients:
  • 1lb flour (white, whole wheat, whatever turns your crank.  I have pretty good success starting with about 10-14oz unbleached white flour, and topping up with whole wheat, but going all white flour is the classic french bread recipe) plus some for working.
  • One 12oz bottle of beer (or, I suppose, 12oz of water).
  • 2tsp salt
  • 1tsp instant yeast (if you buy the traditional yeast instead of instant, I presume you already know how to activate it)
Method in Brief:
  • Combine dry ingredients
  • Stir in beer
  • Knead
  • Cover, let rise for at least 1 hour
  • Punch down mixture, recover.  Let rise for at least 2 hours or refrigerated overnight
  • Pre-heat oven to 450F
  • Form dough into loaf, slash top, dust lightly with flour
  • When dough is placed in oven, spray oven surfaces with water, or throw in two ice cubes
  • Bake for 25-30min or until the crust is nicely browned.  Let stand for at least 15 minutes.
Method with Narrative (and an explanation of the ice cubes):
Mix the flour, salt, and yeast in a bowl that you think is too big.
Pour in the beer.  It helps if the beer is not ice cold, since that will really slow down the yeasties.  If you didn’t think to take the beer out earlier, no worries, just run it under a warm tap until it’s no longer cold to the touch.  This is not an exact science, nor should you treat it as such.
Mix with a spoon until the ingredients are combined.  This will be a really sticky dough.  It will make you sad the first couple times, until you learn to recognize the goodness it portents.
Sprinkle some flour on a countertop or other largish surface, and dump the dough out on to it.  Remove any rings or watches.
Now you’re going to knead the dough.  If you’ve never kneaded before, it’s easy.  Your job is basically to keep mooshing the flour molecules past one another so that there is ample opportunity for them to link up into chains called “gluten”.  Gluten is what gives bread its elasticity.  If you are not accustomed to thinking of bread as “elastic”, think about how a slice of bread deals with mashing and stretching (i.e. by mashing and stretching) vs. how a slice of cake does (i.e. by crumbling).  Flour mixtures all tend to form gluten.  Things like kneading help it out (which you do it with bread doughs and not cake doughs), things like fat hinder it (which is why you add things like shortening to cake – so-called because it “shortens” the dough – breaks up the gluten chains).
Kneading is also a nice analog process for getting the flour:beer ratio right, since your natural stickiness aversion will tend to have you adding sprinkles of flour as you work the dough and the surface becomes sticky again and again.  To knead, use your fingers, knuckles, or palms to stretch the dough out along one axis, then fold it over on itself and repeat.  When it gets too sticky to work with (try to keep it as sticky as you can stand) add more flour.  You don’t have to do this for long, 5-10 minutes is probably fine.  When you’re done, you’ll see a difference in the dough ball: if you stretch it a little, it will bounce back mostly into shape.
You’re basically done the hard work.
Throw the dough ball into a big bowl.  If you’re clever, you will have really lightly oiled the bowl first (not like a muffin pan or anything, just a shot of Pam, or a dab of canola oil swooshed around on a paper towel) because it will make the dough easier to remove later.  Throw a dishcloth over the bowl and leave it somewhere warm in your kitchen to think about life.  If your oven is a newer one with a “Proof” setting, now is when you can use it.
You don’t want to cook the dough here, you just want the yeasties to be at a happy temperature.  In case you weren’t clear, yeast are little, edible, live fungi that eat sugars in flour (among other things) and leave alcohol and carbon dioxide gas as well as a host of mostly nice-tasting things in their wake.  The alcohol is mostly incidental for our purposes here, though there is a delightful symmetry in the fact that we’re mixing beer (grains + yeast + water = alcohol and incidentally CO2) and bread (grains + yeast + water = CO2 and incidentally alcohol).  Point is, these guys will work through the flour making little bubbles as they go, which give our bread the ability to rise.  Very exciting.
After an hour or two, your dough will have doubled in size.  The only problem with cooking it right now is that your bubbles will not be evenly distributed.  You’ll probably actually have a couple giant bubbles that will lead to silly looking bread.  And anyhow, that’s not actually the only reason – giving the yeast more time also lets them develop more interesting flavours.
What you CAN do after an hour (or two, or three, this is not an exact science) is what bakers call “punching down.”  You can leave the dough in the bowl, but basically what you want to do is re-distribute the bubbles through the dough, and bust up any big ones.  Just rotate the bowl around, folding the edge back towards the center until you’ve got a ball again without any obvious giant bubbles.  It will lose some of its newfound volume too, that’s okay.  The yeasties still have plenty to work with.
What you do now is up to you.  You could wait another hour and bake it and have tasty bread.  You could go out for the afternoon and then bake it for dinner and have very tasty bread.  Personally, I do this on a Saturday, with an eye to baking it on Sunday, so I give it the rest of the day to rise, and then I’ll generally punch it down a second time and put it in the fridge overnight.  By Sunday dinner, I have me some outstandingly tasty bread.  Again, I’m not taking credit, the recipe is as old as the hills.  But ask around, my Sunday night bread kicks ass.  Anyhow, time passes.
Your dough should be room temperature when you go to bake it which is trivial unless you’ve gone for the (highly recommended!) overnight rise in the fridge.  Why not just leave it to rise overnight, out of the fridge, I hear you ask?  By all means, give it a shot.  It will rise a lot, and the surface will feel like silk, and it will be nearly impossible to handle (think about trying to form a loaf out of steam, say).  But I admire your moxie.
Every time you manipulate your dough, some of the bubbles will collapse.  They’ll come back as long as there is anything else for your yeast to eat (which there will be), so don’t worry, but it does mean that you don’t really want to be doing any dough manipulation immediately before baking.  I deal with this by forming the loaf and putting it on a sheet of parchment for the final rise, since parchment can go directly into the oven.  Pro-tip: wax paper is not parchment.
This is a French bread recipe, so you want to bake it on a stone or, failing that, a cookie sheet.  You don’t put this in a loaf pan.  That means that you have considerable flexibility on the size and shape of your loaf.  You can sort of just plop your bread ball down and make a round “boule” loaf, or you can form it into the standard french-stick ellipsoid.  The only trick here is to try to ensure that the “skin” of the loaf, the soon-to-be-crust, is stretched nicely instead of lying slack.  To do that, as you’re shaping it, curl the sides of the loaf down under itself, so that the top skin stretches.  This is easier to do than to describe – you’ll get the hang of it.
Heat your oven to 450F (convection ovens are yay, and will generally be smart enough to re-interpret that as 425F since they do a better job of baking.  If yours doesn’t, help it out.)  If you have a baking stone, it should obviously be in there too.  When the oven is hot, right before putting the bread in, slash the top a few times and dust it with a little more flour.  Not only does this give it a classic look, but it also lets the bread rise more evenly as the bubbles expand in the heat.
Right after you put it in the oven, throw in a few ice cubes.  Not on the bread, just anywhere in the oven.  The ice cubes are key. They will form steam, and the steam will condense on the dough, since it is cooler than the air in the oven.  In the process, they will give up some heat to the surface of the dough.  This makes for very happy crusts, and is the difference between people thinking you cooked bread, and people thinking you are super-awesome.
5 minutes in, you can throw a few more ice cubes in, to finish the job. Be careful when you open the oven door, that steam is going to try to have a party on your face.
Total baking time is about 25 minutes, though I generally have to give whole wheat dough a little bit longer to get a good crust going.
Take it out when it’s ready, put it on some kind of rack to cool.  If you put your ear up next to it, you will hear the signature sound of bread – a crackling as it cools, that makes my mouth water just thinking about it.
Cut thick slices.  Use real butter.  Marvel at how something so easy can taste so good.  I know there’s a lot of words there, but by the third time you do this, it is easier and more rewarding than just about anything else you’ll do in your kitchen.

Wednesday, May 11, 2011

Linzer Snite

For recipe in english, please scroll down
 

Iduca dva mjeseca u okviru igre 'FBI rukavice', koju je osmislila mamajac, istrazuje se blog 'Cooking by Mirjana'. A tamo svega...Lijepih i recepata i prica i slika.

Za pocetak sam probao da napravim Linzer Snite, lijep i jednostavan recept, a kako je brzo nestao i pravi hit sa mojim klincima. Ja sam ga izrezao dok je jos bio topao, tako da se malo kolac mrvio, iduci put cu mozda sacekati da se ohladi :).
Ovo je jedan od onih kolaca sto je bolji sto duze stoji, e sada da li je to samo zato sto se ukusi pomijesaju, postanu intenzivniji, ljepsi ili zato sto ga sve manje ima pa postaje bolji? Ima sigurno i jednog i drugog.

A evo kako su kod mene uradjene Mirjanine Linzer Snite, sa malim promjenama uslovljenim trenutnim stanjem namirnica...


Potrebno:

Za donju koru:
125 g putera sobne temperature
150 g secera (kod mene je bio secer u prahu)
1 jaje
150 g prosijanog brasna
pola kasikice praska za pecivo

300 g dzema od malina

Za gornju koru:
175 g putera sobne temperature
125 g secera (kod mene je bio secer u prahu)
30 g praska za puding sa ukusom vanile
75 g brasna
1 jaje
150 g mljevenog keksa
100 g mljevenih badema
100 ml mlijeka

50 g mljevenih badema za posipanje

A napraviti ovako:

Izmiksati puter sa secerom. Dodati jaje pa nastaviti sa miksanjem dok se ne dobije homogena smjesa. Dodati brasno i prasak za pecivo pa sve promijesati. Sipati u pleh (25cm x 30cm) postavljen sa papriom za pecenje.
Umijesati viljuskom dzem, pa ga premazati preko prve kore.
Za drugu koru opet izmiksati puter sa secerom, dodati jaje i mlijeko izmiksati (u pocetku na sporoj brzini) dok ne postane homogena smjesa. Postepeno dodavati brasno, prasak za pecivo i puding, izmjesati. Dodati i mljeveni keks i bademe. Sve dobro izmjesati i sipati preko dzema. 
Posuti mljevenim bademom gornju koru, pa peci u ugrijanoj rerni na 180°C oko 40 minuta. Probati ostaviti da se ohladi pa rezati i sluziti.


Thursday, May 5, 2011

Beef Beer Stew

For recipe in english, please scroll down


Prije neki dan me je Ceca, Rankina rodica i vjerni citalac mog bloga :), pitala zasto je vecina post-ova o kolacima. Nisam joj dao neki odredjeni odgovor, a vjerovatno su kolaci dominantni zato sto su 'fotogenicni'. Kuvana jela su nesto sto se radi uglavnom bez recepta, kolicine uglavnom nicyu vazne, ono sto je pri ruci ide u serpu, a ono sto se nema moze i bez toga, zacini se po ukusu mijenjaju. Sve u svemu, jednostavno.
A neko nekad rece, najteze je raditi jednostavne stvari, potpuno u pravu.
Vjerujem da ko god je ikad bio u kuhinji ima svoju verziju gulasa ili sosa sa junecim/telecim mesom. Ja sam ovaj put u okviru igre "ajme, koliko nas je!", koju je pokrenula monsoon, a za mjesec maj je Ana zadala pivo kao namirnicu, napravio moju verziju gulasa. Jednostavne namirnice, i nije tesko da se napravi, uzme malo vremena, ali rerna to radi sama i vrijedi sacekati. Kao prilog uz gulas, kuvani krompir, riza, tjestenina...nema greske sta god da se uzme.

A evo kako je to kod mene bilo.

Potrebno:

Fkasa omiljenog crnog vina, u mom slucaju kalifornijski 'Opus One' ili neki italijanski Amarone
1000 g juneceg mesa, izrezanog na kockice 
100 ml ulja
1 glavica crnog luka
4 cena bijelog luka
150 ml paradajz paste
500 ml govedje supe
330 ml crnog piva (ili vec koje se ima)
300 g pecurki, izrezanih na listice
so, biber, persun

A napraviti ovako:

Upaliti rernu na 175°C. U vecoj posudi ugrijati ulje pa dodati meso, posoliti i pobiberiti po ukusu.


Prziti i okretati meso dok ne dobije smedju boju sa svih strana, pa izvaditi i staviti sa strane


U posudu na kojoj se przilo meso dodati isjeckani crni luk, pa prziti dok luk ne dobije zlatno smedju boju.


Dodati isjeckani bijelu luk i paradajz pastu.


Promijesati i dinstati 3-4 minute, stalno mijesajuci.


Vratiti nazad meso, sipati govedju supu.


Dodati i pivo, opet posoliti i pobiberiti.


Sacekati da prokljuca, poklopiti poklopcem, pa peci u rerni oko 45 minuta. Izvaditi iz rerne, dodati pecurke, promijeasti, opet poklopiti pa nazad u rernu na jos 45 minuta ili dok se sos ne zgusne.


E sada uzeti onu flasu vina jer je vec otvorena skoro sat vremena, pa sipati sebi casu i poceti pijuckati, a kada je gulas gotov, onda nastaviti sa ostatkom vina. To je kod mene jer nisam neki pivopija, ali zato vino...
Izrezati persun, pa sipati gulas preko priloga, persun preko, prijatno.


100 ml vegetable oil
1000 g beef chuck roast, cut into large chunks
1 large onion, peeled and chopped
garlic cloves, peeled and sliced
1 small can tomato paste
bottle dark beer
2 beef stock
300 g mushrooms
salt, pepper, parsley

And make like this:

Preheat oven to 175°C. Heat oil in a large, heavy-bottomed pot. Add beef chunks, season with salt and pepper and brown them. When they are very well browned, remove them with tongs and reserve in a bowl. Add onions to the hot pot and sauté them until they are golden brown. Add garlic and tomato paste and cook, stirring, for a few minutes. Place browned beef back into the pot and add the beer and stock. Season with salt and pepper and bring to a simmer. Place a tight fitting lid on the pot and put it in the oven. After 45 minutes take it out, add mushrooms, put lid back and return it to oven. Stew slowly until the beef is very tender and the broth has thickened, for about 45 minutes more.

Recipe in english:

You'll need:

Tuesday, May 3, 2011

Cokoladni rolat sa cokoladnim filom

For recipe in english, please scroll down
 

Nekad je stvarno bespotrebno pricati o nekom receptu, dovoljno je reci, cokolada, jaja, secer, slatka pavlaka pa jos cokolade...
Jedino sto mu je mana, rolat je 'pukao', nije mi uspijelo da ga urolam da bude 'pravi rolat'.


Recept je iz knjige 'Baking' , "Love Food" izdavac.

Potrebno:
4 jaja
115 g secera u prahu
115 g tamne cokolade, itopljene i ohladjene
30 ml espreso kafe ili 1 kasikica instant kafe razmucene u 30 ml vrele vode, ohladjene
secer u prahu za dekoraciju

250 ml slatke pavlake
140 g bijele cokolade, izlomljene u komadice

A napraviti ovako:

Umutiti zumanca sa secerom dok ne postanu skoro bijela. Dodati istopljenu cokoladu i kafu. Mikserom umutiti bijelanca dok ne postanu cvrsta. Umutiti malo bijelanaca u cokoladnu smjesu, izmjesati pa dodati ostatak bijelanaca. Mijesati od krajeva prema sredini dok se masa ne ujednaci.. Sipati u pleh (23cmx33cm) na kome staviti papir za pecenje, pa peci na 180°C 15 do 20 minuta. Izvaditi iz rerne, pokriti sa vlaznom, cistom kuhinjskom krpom pa ostaviti bar 8 sati ili jos bolje preko noci.
Za fil ugrijati slatku pavlaku skoro do kljucanja, staviti cokoladu u multipraktik ili sjecka, i dok motor radi polako dodavati slatku pavlaku. Paziti da pavlaka ne pocne da prska po kuhinji :). Brzo se cokolada sjedini sa pavlakom. Prebaciti u posudu i ostaviti na hladnom, 8 sati ili preko noci.
Da se napravi rolat, umutiti slatku pavlaku sa bijelom cokoladom dok ne postane cvrsta. Izrezati papir veci od rolata, posuti secerom u prahu i stavit na radnu podlogu. Okrenuti rolat na papir. Oguliti oaoir na kome se rolat pekao. Namazati fil na koru, pa urolati rolat. Prebaciti na posluzavnik, i ostaviti na hladnom par sati.
Rezati i sluziti.


Recipe in english:

You'll need:

4 eggs, sparated
115 g superfine sugar
115 semisweet chocolate, melted and cooled
1 tsp instant coffee granules, dissolved in 2 tsb hot water, cooled
confectioners' sugar, to decorate

250 ml heavy cream
140 g white chocolate

And make it like this:

Line a 23x33cm jelly roll pan with nonstick parchmment paper. Whisk the egg yolks and sugar in a bowl until pale and mousse-like. Fold in the chocolate, then the coffee. Place egg whites in a clean bowl and whisk until stiff but not dry. Stir a little of the egg whites into the chocolate mixture, then fold in the reminder. Pout into the pan and bake in a preheated oven, 180°C, for 15-20 minutes, or until firm. Cover with a damp dish towel and let stand in the pan for 8 hours, or overnight.
meanwhile, make the filling. Heat the cream until almost boiling. Place the chocolate in a food procesor and chop coarsely. With the motor running, pour the cream through the feed tube. Process until smooth. Transfer to a bowl and let cool. Let chill for 8 hours, or overnight.
To assemble the roulade, whip the chocolate cream until soft peaks form. Cut a sheet of waxed paper larger then the roulade, place on a counter and sift confectioners' sugar over it. Turn the roulade out on the paper. Peel away the lining paper. Spread the chocolate cream over the roulade and roll up from the short side nearest to you. Transfer to a dish, seam-side down. Let chill for 2 hours.